The Tileset Journey
Step 1: The Situation
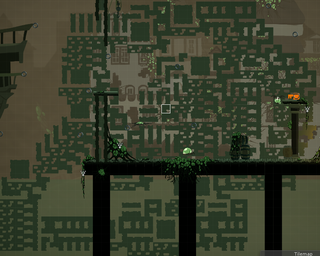
Early in development it became clear that we needed to create two separate Tile sets in order to build Levels for Pandemic.
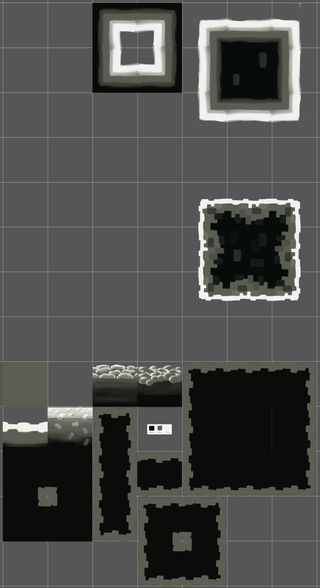
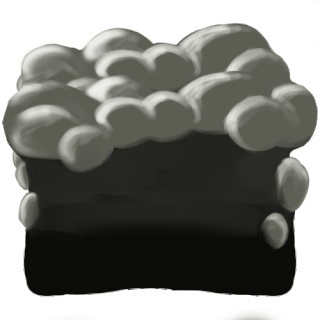
One rather simple flat colored one for walls in the background, and another more complex one that would be used to craft the player-layer of the game.(things like the ground the player moves upon
or the walls he collides with)
Step 2: Getting Started
Seeing as I was the only one with some experience in Creating Tile sets, I created several tests and experimental variants to see what worked with the art style as well as trying to find out how complex the tile set needed to be.
Step 3: Template Creation
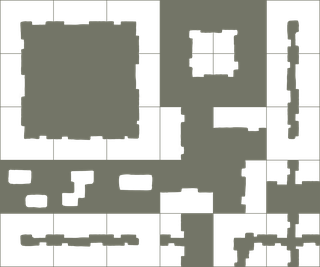
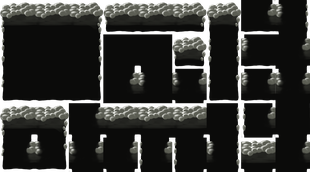
After testing them and getting approval for one of the designs by our Art Lead Katharina Franz I created a template that showed the necessary variations of blocks needed.
Light grey areas are those that the player can walk on, with dark grey being other sides where the tile sets would "end" but which would not be by ground the player walked upon.
The size of these visualization helpers was up to scale, meaning that we needed the light grey area to be of roughly this volume to allow the player to stand at the correct height on the tile set.
Our Environmental Artists had no experience with 2D games or unity in any way, and as such after some fruitless attempts to explain the desired result, and why it was necessary to have all these tiles we decided that I would draw the tile set myself. This also gave the additional benefit that I was already a bit experienced with getting the tile sets into unity and as such could hopefully implement and iterate faster if any problems would surface, something I am very glad about in hindsight.
Step 4: Template Creation
I started with the back wall, as it was purely shape based with one flat color, allowing me to get some quick progress and test the workflow on a reasonable scope.
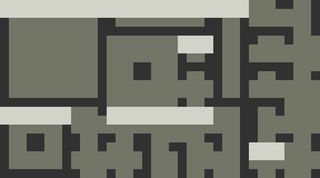
After some time working with it I had fixed the old background windows and created a brick stone style tile-set that allowed for the creation of background wall pieces that would not distract the player but still give a clear indicator of where buildings started and ended.
Step 5: Lines appear
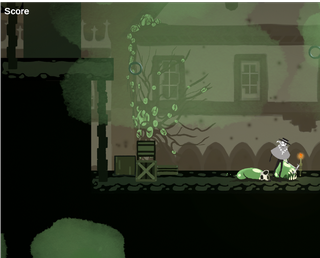
Now, upon implementing the tile set into unity I encountered a visual problem that manifested as small transparent lines appearing and disappearing between some of the tiles while the player was moving around the scene. (Visible inside the red circles in the screenshot)
I also realized that they had already been in all areas where I build things out of test tile sets, but they had slipped by unnoticed by everyone so far.
At this point I was highly confused. I had already implemented tilesets in exactly this way and it worked without problems in a prior Project.
Step 6: Research
Taking this into consideration I started a research round trough Google, Reddit and the Unity Forums right away instead of trying to fix it on my own.
This search made it clear that this was a recurring problem, and something that several different workarounds existed for.
There were several workarounds, that required deactivating camera or light settings which were no options for us as we needed those settings in our Project.
Instead I found three different ways that were said to fix the problem:
- Some pixels of Padding between the tiles
- Changing the settings in Unity in such a way that the outer border of each tile was lost.
- Importing every tile as single picture instead of one tile set image.
Step 7: First Repair Attempt
Number 1 felt like it would retain the organization benefit of only having one tile set image instead of a whole bunch of singular assets while also being able to fix the problem in a clean way, so I chose this approach.
I rearranged the whole tile set to give space for a small border by hand in Photoshop and re imported it into unity only to be greeted by a different kind of problem. Now the flickering transparent lines where gone, but they had been replaced by flickering opaque lines in the color of the tile set.
Step 8: More Research
I decided to better understand what caused the problem, and after a more in depth research understood that Unity in some cases would take the Border outside the area that had been chosen for a sprite. (if the sprite had been imported as part of a bigger image, as is the case with for example a sprite sheet) And that this could apparently not be fixed on a surface level, instead requiring a rather deep change in the way Image displaying works in Unity, something to difficult and time consuming for our Project.
Step 9: Second Repair Attempt
This new found knowledge now meant that importing the tiles as single images would with almost absolute certainty fix the problem at hand, and that the quick fix of losing border pixels for each tile was also safe, even if it meant screwing up the borders of each tile a bit.
For the Back wall I decided that Number 2 was good enough as there were no visual tiling errors visible when using it, and the simplistic way it was designed Art wise meant that unclean tiling caused by the lost border pixels would not be visible to the player.
Step 10: Exporting it from Photoshop
Drawing all the tiles for the ground and wall tileset proved faster than expected, as quite much of it was simply copy and pasting things around over and over.
Exporting it out of Photoshop was something I struggled with for quite some time, with multiple different workflows all not leading to the desired result as the quick export
option automatically cut away free space around the tiles that I still needed, and an old Feature in Photoshop that should have helped sadly had problems with displaying
transparent areas correctly.
In the end I just cropped and exported each of the over 40 tiles manually, as I just wanted to be done with the whole process by now.
Step 11: Repairing the Repository
Right when I though I was finished one last hurdle appeared. Trying different variations of tiles and deleting them again and again only to replace them with new ones proved to be to much stress for the local clone of my git repository and it completely broke leading to blue screen errors whenever I tried to start Git Kraken. So I lost some more valuable time there, but as I had hoped, a full new reinstall of Git managed to fix this last roadblock.
Step 12: Lessons learned
Having done most of the work on this tileset Journey during one stressful weekend I have to admit (in hindsight) that the use of an external tool like Tiled or other similar software would have allowed a faster ex- and importing of tile sets into Unity instead of cutting up the whole thing by hand or adding padding manually. Still, the whole incident reminded me to stay humble with my time estimates, as even things that had worked smoothly in a previous project might not do so in another one later down the line.
In the end I still got the tile sets together in time so that I could staff the levels with these tiles and other assets, creating a stage on which the game now could be played properly.

